Photo Inside Balloon: Capturing Magic Within the Sphere
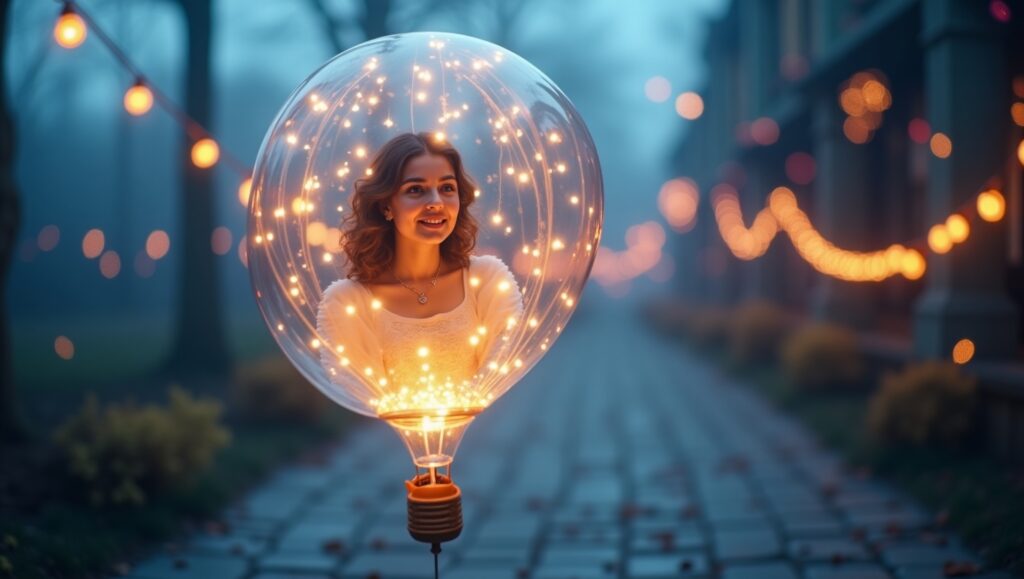
Imagine a photograph that captures not just a moment, but a world inside a delicate, translucent balloon. The concept of a “Photo Inside Balloon” is a fascinating blend of art, photography, and a touch of whimsy. It invites us to explore the interplay of light, color, and perspective, all encapsulated within a fragile sphere.
In this blog post, we will dive deep into the art and technique of creating photos inside balloons, explore creative ideas, and provide practical tips to help you capture your own magical images. Whether you are a professional photographer, an enthusiast, or simply curious, this guide will inspire you to see balloons in a whole new light.
What is a Photo Inside Balloon?
A “Photo Inside Balloon” refers to an image where the subject or scene appears to be contained within a balloon. This can be achieved through various methods:
- Physical placement: Placing a small photo or object inside a transparent balloon.
- Reflection photography: Capturing the reflection of a scene on the surface of a balloon.
- Post-processing: Using photo editing software to superimpose an image inside a balloon.
- Creative lighting and angles: Using balloons as lenses or filters to distort and frame a subject.
Each method offers unique artistic possibilities and challenges.
Why Create Photos Inside Balloons?
Balloons evoke feelings of joy, celebration, and childhood wonder. Incorporating photos inside balloons adds layers of meaning and visual interest:
- Symbolism: The balloon can symbolize fragility, dreams, or encapsulated memories.
- Visual impact: The round shape and translucent surface create intriguing distortions and reflections.
- Creativity: It pushes photographers to experiment with composition, lighting, and perspective.
- Storytelling: A photo inside a balloon can tell a story within a story, inviting viewers to look closer.
Why Create Photos Inside Balloons?
1. Physical Placement Inside Transparent Balloons
One straightforward way is to place a small printed photo or object inside a clear balloon before inflating it.
How to do it:
- Use a transparent balloon (often called a “bubble balloon”).
- Print a small photo on thin paper or use a small object.
- Carefully insert the photo or object into the balloon before inflating.
- Inflate the balloon slowly to avoid damaging the photo.
- Photograph the balloon with proper lighting to highlight the image inside.
Tips:
- Use a photo that is small enough to fit without crumpling.
- Use a balloon pump for controlled inflation.
- Position the balloon against a contrasting background to make the photo inside stand out.
2. Reflection Photography on Balloon Surfaces
Balloons have shiny, reflective surfaces that can capture distorted reflections of their surroundings.
How to do it:
- Inflate a shiny balloon (metallic or latex).
- Position the balloon near an interesting scene or subject.
- Use a macro or close-up lens to capture the reflection on the balloon’s surface.
- Experiment with angles to get the best reflection.
Tips:
- Use natural light or soft diffused lighting to avoid harsh glare.
- Try different balloon colors for varied reflection effects.
- Use a tripod for stability during close-up shots.
3. Post-Processing and Digital Composites
If you prefer digital art, you can create a photo inside a balloon using photo editing software like Photoshop.
How to do it:
- Take a photo of a transparent balloon.
- Select the balloon area using selection tools.
- Insert the desired photo inside the selection.
- Adjust opacity, blending modes, and add shadows or highlights to create realism.
- Add reflections or distortions to mimic the balloon’s curvature.
Tips:
- Use high-resolution images for better quality.
- Study real balloon reflections to replicate natural light behavior.
- Use layer masks for precise editing.
4. Using Balloons as Lenses or Filters
Balloons filled with water or air can act as lenses, bending light and creating unique photographic effects.
How to do it:
- Fill a transparent balloon with water.
- Position the balloon between the camera and the subject.
- Focus on the distorted image seen through the balloon.
- Experiment with different distances and angles.
Tips:
- Use a macro lens for detailed close-ups.
- Use a dark or neutral background to highlight the effect.
- Be careful handling water-filled balloons to avoid spills.
Creative Ideas for Photos Inside Balloons
1. Memory Capsules
Create balloons with photos of memorable moments inside. Use these for birthday parties, weddings, or anniversaries to add a personal touch.
2. Miniature Worlds
Place tiny figurines or scenes inside balloons to create surreal miniature worlds. This can be combined with macro photography for dramatic effect.
3. Nature Reflections
Capture reflections of trees, flowers, or skies on balloons outdoors. The round shape can create a fish-eye effect, adding a dreamy quality.
4. Abstract Art
Use colored balloons and creative lighting to produce abstract images with photos or patterns inside. Play with shadows and reflections for artistic compositions.
Technical Tips for Shooting Photos Inside Balloons
- Lighting: Use soft, diffused light to avoid harsh reflections and glare. Natural light near a window or a softbox works well.
- Background: Choose contrasting backgrounds to make the balloon and its contents stand out.
- Focus: Use manual focus for precision, especially in macro shots.
- Stability: Use a tripod to avoid camera shake.
- Camera Settings: Use a small aperture (high f-number) for greater depth of field to keep the balloon and photo inside sharp.
- Post-Processing: Enhance colors, contrast, and sharpness to make the image pop.
Challenges and How to Overcome Them
- Balloon fragility: Balloons can pop easily. Handle with care and avoid sharp objects.
- Reflections and glare: Use polarizing filters or adjust lighting angles.
- Distortion: Embrace distortion as part of the artistic effect, or use editing to correct it.
- Inserting photos: Use thin, flexible prints and inflate slowly.
Equipment Recommendations
- Camera: DSLR or mirrorless with macro capability.
- Lenses: Macro lens (e.g., 100mm), standard prime lens (50mm).
- Lighting: Softbox, ring light, or natural window light.
- Tripod: For stability.
- Balloon pump: For controlled inflation.
- Photo editing software: Adobe Photoshop, Lightroom, or free alternatives like GIMP.
Conclusion
The “Photo Inside Balloon” is a captivating concept that combines creativity, technical skill, and a sense of wonder. Whether you choose to physically place photos inside balloons, capture reflections, or create digital composites, the possibilities are endless.
By experimenting with light, perspective, and composition, you can create images that tell stories, evoke emotions, and invite viewers to look closer. So grab some balloons, your camera, and let your imagination soar!